Pay egg-stra attention to instructions in the manual
Having completed all the painting and decaling works in the previous post, it is time to egg-semble the kit.
Pieces of the kit waiting to be assembled
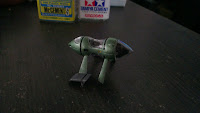
First part to assemble are the Fast Packs.
They are a bit tricky and requires some force. It was hard to align the pieces and I was afraid to scratch the paint job. Luckily it all turns out fine.
Left: Wheels are next on the list
Right: Wheels attached to the plane.
Note: The wheels do require some force to put them in place. Maybe because I have painted my kit but there is no harm to be extra careful. I broke the landing gear of the front wheel and had to enlist the help of Mr. Cement.
How the wheels look like attached to the plane
Left and right view of the YF-19

Left: The gun is to be attached into the hole found at the middle below the plane
Right: Gun attached to the plane
Good to know that there are some clearance between the gun and the ground
The next piece to assemble: 1) The side wings to either sides of the cockpit (red ring) and 2) The antenna at the back (blue ring). The pilot is easy to assemble. Just place the peg under the pilot into the hole found at the cockpit.
Make sure the mini wings are assembled at the correct orientation. Check and double check the manual and the pictures on the box and in the manual. Once the piece is fixed, it will be very hard to remove without the risk of breaking.
The antenna is movable (until the Fast Pack is assembled).
The canopy and the plane
I thought it would be loose so I prepared the cements but I was wrong. The canopy was hard to clip in place without the worry of breaking the parts and really needing to use the cements
Complete view of the plane before the installation of the Fold Booster
As the title of the post suggest, please pay extra attention to the instructions in the manual.
There are these two symbols which appears all around the manual...
...but pay more attention at this section
Pieces of the Fold Booster
Completely assembled Fold Booster. Pay more attention to the two side pieces. They are very tight, flimsy and breaks easily. I was having cold sweat trying to assemble them
The Fold Booster together with the completed plane
The back portion of the Fold Booster will be attached in the holes circled in red
Fold Booster assembled. The front part of the booster is just resting on the plane.
Up until here is the complete assembling process of the YF-19. The next post will show the completed plane, discuss some pros and cons and what I think about the kit as a whole.


No comments:
Post a Comment