First but second
Taking a break after working on the katanas for the PG Astray Red Frame and preparing the pieces for the leg, I decided to fulfil a promise made when I was reviewing Muddy. The promise is to do a review on Roar before the third figure is released . This is the first dinobot combiner to be released by ToyWorld (TW) but is the second to be reviewed. Roar is known as Snarl in the G1 cartoons.
Here are some fact about Snarl from Transformers Wiki: "Snarl is an unhappy, unsociable loner. He grudgingly follows Grimlock's orders and that's about it. He leaves thinking to others. He has few opinions and rarely expresses those he has. Snarl's uncommunicative nature only serves to fuel his sense of isolation. On top of all this, he hates the ungainly stegosaur form given him by the Ark and feels that the war on Earth means he may never see his beloved Cybertron again. Snarl is a profoundly unhappy being.
Only in war does Snarl feel happiness. Only the joy of combat washes away the ache in his spark, and lets him forget anything but the rising thrill of the fight. For these reasons Snarl revels in combat more than even his fellow Dinobots."
Now that we know more about Snarl, it is time to look at the packaging:
Now that we know more about Snarl, it is time to look at the packaging:

Front of the package

Back of the package


The drawing of Roar is on the right of the box and the figure and dino mode is on the left side

Top of the box is a simple logo and name of the company


Bottom of the box shows where the figure is made and the warnings
Now that the photos of the box is done, it is time to open the toy:

Opening of the box flap

Opened box with the instructions to greet you

Back of the instructions
There are only a total of 24 steps involved in transforming Roar. His transformation process is a lot simpler than Muddy's which has 32 steps.

Character card and sticker
Remember the character card for Muddy? Roar has the back of the card facing up. Mentioned before, the back of the card contains the figure's stats.

Styrofoam protection of the figure
Up until here, the packaging for Roar is the as Muddy. The only difference is the figure on the sides of the box. It is save to assume that the other Dinobots from TW will be packaged the same way with the exception of the third Dinobot.
The third Dinobot in line to be released is called Corelock or better known as Grimlock. His dino mode reminds me of a combination of both Transformers animated and Masterpiece Grimlock. From images in the internet, he come with the combiner parts but I do hope they included the combiner instructions too. I'm really interested to see how Roar and Muddy transform to for the leg of the combiner.
In my opinion, TW should have included the combiner parts with each figure like that GCreations did with their Thunderous. Another thing TW should have done is release the name for the combined mode. Like GCreations, they named their dino combiner Shuraking. Until today, I have no idea what is the name of TW's combined dinobots.
Removing the top of the Styrofoam reveals Roar all nice and snug in his Dino mode.

Roar in his Styrofoam packaging
The weapons are the same as Muddy. The only difference is that the sword for Roar is so much longer and looks more appropriate. I guess it all boils down to the design of the figure and where the weapons can be stored in their dino mode.
Removing Roar from the packaging and you get to see that the tail is detached from the main figure and it is covered with a sponge.

Roar out of the packaging
Another view of the tail in the sponge protection.

View of Roar's tail in sponge
The main purpose of the sponge is to protect the fins and spikes. Kudos to TW for thinking of protecting the spikes and fins on the tail. After removing the tail from the sponge, the next step is to attach the tail to Roar. Something like pin the tail game kids play during parties.
Attaching the tail to Roar is simple. There is a hole at back of Roar for the peg at the tail to enter.

Insert peg into hole
After all is done, you have the complete Roar in dino mode:

Left view

Right view


Back and front view of Roar
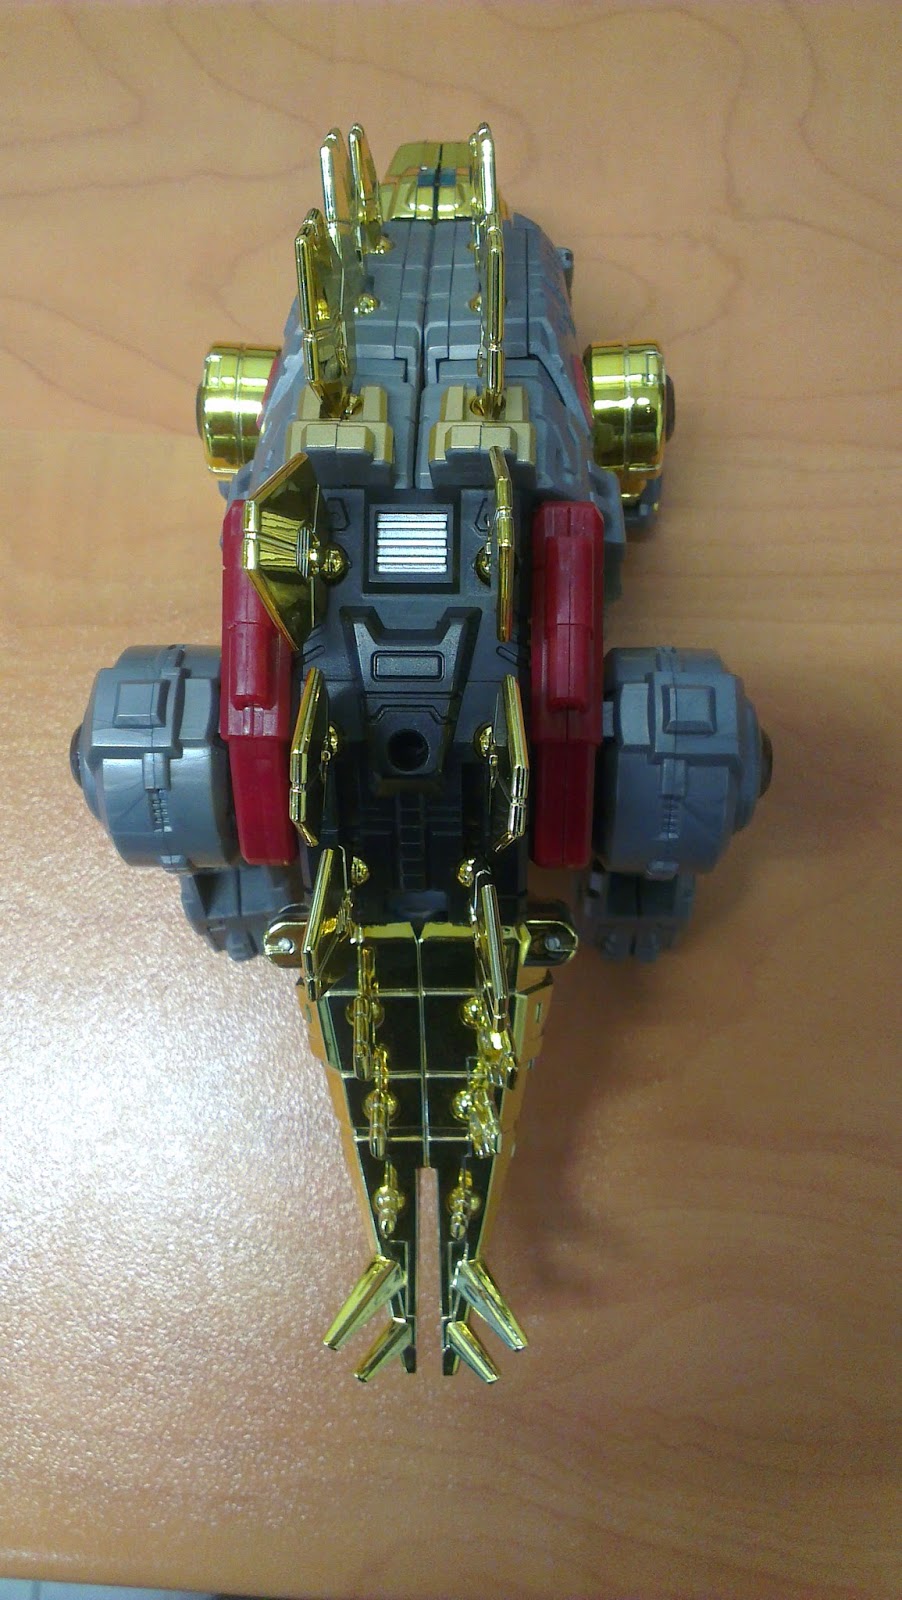

Top and bottom view of Roar
Overall look for the figure in dino mode is nice especially with the chrome parts. The best thing I love about Roar are the fins on the back. They are all attached using ball joints means each fin can be moved individually. The only thing which cannot be moved are the spikes at the end of the tail.

Ball joints for all fins
The mouth can be opened but extra care is required. If you are not careful, you will only open one side of the mouth.

One side of the open mouth
There is a little trick to open both sides of the mouth together. There is a small tab located on the right side of the figure's mouth.

Tab in the mouth
The trick, if you didn't manage to figure it out, is to pull the mouth on the right side of the figure. By doing that, the tab in the mouth will latch on to the other side of the mouth and thus opening both side.

Done correctly, both side will open
If you do it right, you will be able to open both sides of the mouth. I guess TW has to do the mouth this way because the head of the dinosaur will be the legs of the robot. The lower jaw can be opened about 90° which seems a bit abnormal unless Roar eats like a snake i.e. swallowing something whole.

Closed mouth

Slightly open mouth

Mouth opened 90°
Did you notice something odd about the tail section in the above photos? There is a huge gap. Could it be a design defect? Could something be attached into that gap? Any idea what it might be? Stay tune and all will be revealed in the next posting.

No comments:
Post a Comment