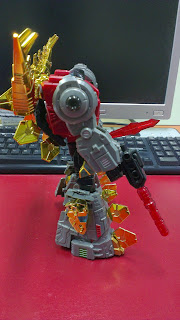
Major back problem
Mentioned in Part 1, there is a gap found at Roar's tail. Managed to figure out the reason for the gap? Like for Muddy, everything has its place and the gap is meant for the sword.
Gap found at Roar's tail
To attach the sword, first you will have to split open the tail.
Split open tail with sword indentation
See the sword indentation on either side of the tail? That is where the sword goes. Just attach the sword according to the indentation.
Sword attached in the indentation
After that is done, close the tail and attach it back to Roar.
Sword in the rightful place
Now that the sword is done, there is still the matter of the location of the gun. If you notice carefully in some of the pictures in Part 1, you will notice there is a hole at the top of Roar's back which is meant for the gun.
Hole for the gun
Just fix the peg into the hole and you have a fully equipped Roar ready to do some serious damage. Some photos of Roar fully equipped with the gun and sword.
360° view of Roar
With all the attaching of weapons done, now we can have a look at the articulation in dino mode. The front and back leg can be moved forward and backwards, both the front and back toe can be bent downwards and both front and back legs can be bent 90°.
Back leg moving back and front toe bending upwards
Toes at the back leg are bent downwards and the front toes are bent downwards
The front and back legs are bent 90°
I would say the articulation for the legs are kind of standard and they are similar to the movements of what you would expect from a dinosaur.
Now for the transformation. Again this won't be a step-by-step guide transformation. If you are interested in seeing the video, here is a video done by peaugh.
Video is from Youtube. Click here if the video is unable to load
Following the same concept as Muddy, here is Roar in mid-transformation. This is how he will look like after the first page of the instruction.
360° view of Roar in mid-transformation
Roar in mid-transformation looks almost complete with the exception of the head. There are a few minor steps to complete before he can be fully transformed. Also this is Roar without the tail attached. It is easier to do the transformation without the tail because it does get in the way sometimes.
Roar in mid-transformation with the tail attached
After following the instructions and finishing up the minor transformation for Roar, here he is fully transformed:
Another 360° view of Roar
Do take note that this figure is very back heavy. I had to pick him up a few times in order to get the above photos. I did notice that there is one thing which can be done to counter the back heavy problem. You can adjust the tail until you get the correct counter weight.
2 best tail position to counter the back heavy problem
As with Muddy, Roar comes with the 2 same weapons as well. He has the sword and a rifle. The rifle is the same as Muddy's but there is a difference in size for the sword. Here is a little photo comparison between Roar's and Muddy's sword.
Roar's sword
Muddy's sword
Roar's sword is one solid piece where as Muddy's sword can be folded in half. Another difference is the size of the blade. Roar's sword looks much more intimidating and deadly. I guess it can't be helped because Muddy has to keep his sword under the neck in robot mode and Roar in between his tail.
Next is to show Roar with his gun. The gun is exactly the same design and size as Muddy's. I'm guessing the guns for all the dinobots will be the same.
Roar with his gun
Now that the introduction of the weapons are over, Roar can be seen wielding both the gun and sword.
A 360° of Roar holding both gun and sword
Roar has an Easter egg function. Remember earlier in this post where there is a hole at the back to peg in the gun? That hole is still available in robot mode so what other way is more suitable for Roar to carry his own gun. One issue with this method: it does add more weight to the back heavy issue Roar is already facing.
Roar with his gun on the back
To end this review, here is a list the pros and cons and the conclusion of what I think about this figure according to my personal experience:
Pros:
- Chromed parts
- G1 design of Snarl
- Good articulation
- Good details
- Each fins is movable
- Able to carry his own gun in robot mode
- Each fins is movable
- Able to carry his own gun in robot mode
Cons:
- Manual not clear on some transformation steps
- Fingerprints on chromed parts
- Back heavy
- Feet in robot mode cannot be flat on the surface
- Feet in robot mode cannot be flat on the surface
Conclusion:
This figure has the colors and outlook which resembles the G1 counterpart. The major drawback of this figure is that it is very back heavy. You will need to find the correct weight balance by adjusting the tail at his back. There is very little to be said about his dino mode. It looks very nice with all the chromed parts at the back. If you are into dinobots and combiners, you will have to pick this up to complete the set.
Previous review on Roar:
Part 1 - First but second
Part 1 - First but second


No comments:
Post a Comment