Building two kits together (again?)
This is not the first time I'm building 2 kits simultaneously. Remember the PG Astrays? That is still in the WIP stage when I did not manage to complete it before my work schedule went bonkers. A few days ago I did mentioned that I took out an RG kit and was about to start building but didn't have all the necessary stuff with me at the time. The day after, I to take the kit out together with its brother. I have decided to start restart the hobby with:
The GP01 brothers
I'm not going to combine both builds into one post like how I did with the PG Astrays. They will have their individual WIPs and a comparison when similar sections have been completed. By opening the box and having a look at all the runners made me very excited. I forgot how vibrant and colorful the runners were.
Manual comparison:
There are very little differences between the two cover of the manual besides the lighting, the kit number and name. We can see from here that both of the kits will have the same head.
Both manual starts with building the Core Fighter II.
Since this is the WIP for the GP01, I shall start assembling the Core Fighter II, followed by the Core Fighter II-Fb and a brief comparison between the two. Since I know I have a history of losing pieces when I remove them from the runners (i.e. RG RX 78-2 & Eggplane YF-19), I won't be doing that for this build. I will be removing them as and when I need.
First piece: Core Fighter II's nose. I have forgotten how small the parts for RG are. Before losing any pieces, I made sure is was stored in a temporary box.
All required pieces for the nose
This will be the first time I'll be using a 0.3mm mechanical pencil to panel line the white parts instead of using the normal panel line marker.
The Core Fighter II nose complete with panel lines.
Pieces required to complete the front half.
With the front portion of the Core Fighter II completed...
...the stickers can come out to play
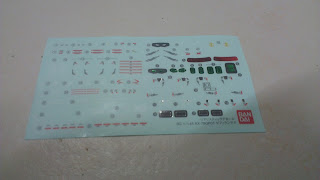
Oh how I miss putting on decals until one of them decided to pop and fly away into the land of no return. Luckily BanDai was thoughtful enough to have a spare decal available. Thank You!!
Pieces required for the back portion.
There is this one time where I clearly remember arranging the completed back and front portion of the Core Fighter II before assembling. I thought I took a picture of it but when uploaded the pictures onto the pc, the picture was no where to be found. I could have imagined the whole thing up but it is too late now.
The completed Core Fighter II minus the wings and weapons
Testing the partial transformation process
One thing to note here are the back yellow vents. They do not sit in snugly and any movement will cause it to fall out. One of it fell out while I was putting the Core Fighter II in the position shown above. I freaked out but luckily the piece was found nearby. I would suggest gluing them in place to avoid any heart attack or stress.
Pieces required for the wings and weapons/beam saber. Decaled and panel lined.
Left and right view of the completed Core Fighter II
Top and bottom view of the Core Fighter II
With the completed of the Core Fighter II, the next post will be the WIP for the Core Fighter II-Fb.


No comments:
Post a Comment