Sunday, November 10, 2024

HG Kamiki Burning Gundam - WIP 4

 The Paint Work Continues

Continuation of painting works from the previous post. The first painting work is the gold color for the sheath and the hand guard of the katana.

Mr.Hobby Mr.Metallic Color GX 209 Red Gold 

Tried the Replenishing Agent for the Red Gold although stated on the bottle that it is not to be used for Aqueous and Mr.Metallic paint.

Stated on the bottle to not use on Mr.Metallic Color but had to try as I did not want to get a new bottle of paint. Hopefully nothing bad happens to the paint in future

Wednesday, November 6, 2024

HG Kamiki Burning Gundam - WIP 3

 Here I come to save the day!

Started with painting works for the feet in the last post. With what happened, I made sure to check the paint before use and had the correct thinner at hand.

Red paint used is Mr. Hobby Mr. Color 158 Gloss Super Italian Red

Grey paint used for armor is Gaia Base Color 074 Gloss Neutral Grey IV

   
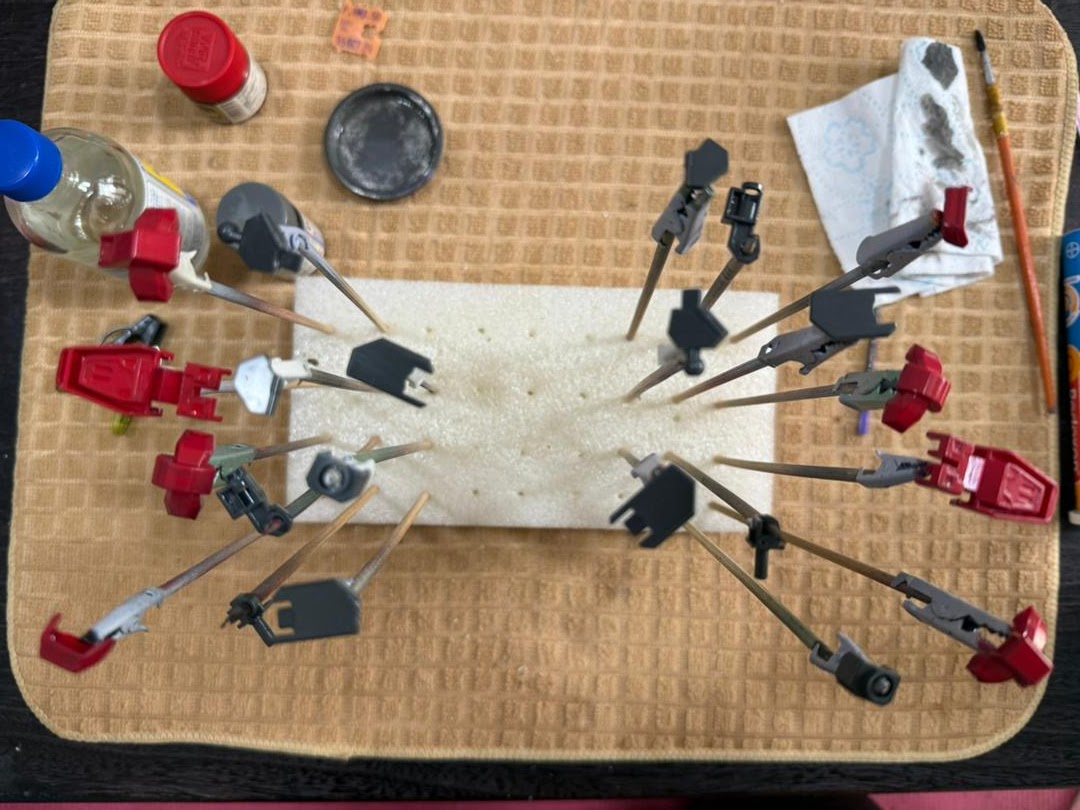
Parts of the red and inner frame of the feet. Luckily I have enough clips for all the parts for both sides of the feet. Parts are waiting to dry to see if they require a second coat but only one coat is sufficed 

I did not use any type of palette for painting. All I used is an old used metal cap from an industrial thinner which can be seen in the top picture next to the red paint. That is where I pour a bit of thinner onto it and use the paint from the cap after shaking it. When the paint on the cap starts to dry out, simply close the paint, give it another shake and you are good to go. This might not be the correct method but it works for me.

Monday, October 28, 2024

HG Kamiki Burning Gundam - WIP 2

 A Bad Start For The Build

After separating the parts in previous post, proceeded with nub marks removal which took longer than expected. After that has been done started with brush painting process with the white part. After looking through my paint collection from 8 years ago, this is the only white paint I got in my collection

Mr.Base White 1000

As the paint has been sitting there for years, the content dried up and was a bit rubbery. Figured it would still be usable and went to look for the thinner. It did not hit me that I have taken the wrong thinner. The paint did start to thin like it should have and noticed the mistake when I started painting with it.

'This is not the thinner you are looking for'

Friday, October 25, 2024

HG Kamiki Burning Gundam - WIP 1

 Gotta Love The Burn

With the work all done for the RG Zephyranthes, I have decided to take a break from RG and start a HG kit. The last HG kit was the HG Red Frame (Flight Unit) completed ten years ago. The reason I bought this kit was cause it comes with a katana and I am a sucker for anything with a katana.

Why did I decide to start with this kit? I needed an easy kit to start off and try my hands on brush painting. The most I have brush painted are small details (which I have forgotten how I did it 8 years ago) and this time round I want to try to brush paint an entire model kit. I have some SD in the backlog as well but had an itch to start this as well cause I am curious about the effect pieces.

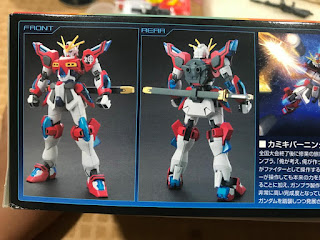
Box art looks awesome

   
One of the side of the box shows the model front and back, details of the gundam and a brief summary of the storyline

Saturday, September 21, 2024

RG GP01 Zephyranthes - WIP 5

 Most relaxing build

After rebooting the build after 8 years with the completion of the waist and arms, body unit and the X-acto blade drew blood I can say this part of the build is the most relaxing as there are no very tiny parts for my big choky hands. This will be the building of the helmet and weapons which will mark the end of the build process.

[Head Unit]

Parts of the head

Completed head assembly

The most difficult part of the head unit is getting the red forehead tab into its assigned place. Had to do a bit of fiddling but finally managed to get it into place.

[Weapons]

Parts of the beam rifle

Beam rifle with the Jitte

Beam rifle

Parts of the shield

   
Completed shield with decals. The shield has a gimmick of extending and 

Waiting for the matte coat to dry

Gundam head on a spike.

Next post will be how the core fighter II bring together both the upper and lower body to form the Zephyranthes.

Tuesday, September 17, 2024

RG GP01 Zephyranthes - WIP 4

 Confusion at its finest

After waiting 8 years since the completion of the waist section and with the recent completion of the waist for Full Burnern, it is now time for Zephyranthes's build to resume.

[Body Unit]

The construction of the body unit is next in the manual. Found some assembled parts in one of the boxes and kept it aside as I did not know which part it belongs to until now. Apparently I have started the assembly of the body unit and stopped. I did the usual removal of necessary parts before assembly and when I wanted to assemble it, I got confused on which part is which number.

Was confused between part C19 and C20

Attached it correctly in the first place, doubted myself, removed and swapped parts, checked with GP01fb, confirmed had it right originally, removed and swapped again and found out the part was loose due to stress of the bigger bar dimension on part C19.

Related Posts Plugin for WordPress, Blogger...