Making It More Visually Pleasing
Today's posting will start with the body of the Liger as the painting for the armor and pilot was completed in the previous posting. First order of business is to place all the pieces on the crocodile clips and satay sticks for ease of work during the painting process and to allow the paint to dry.
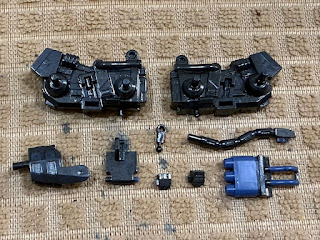
All parts painted with Steel which was used for the control sticks. Used a broader paint brush this round to see if there are any visible brush strokes when the paint has dried. Only the Anti-Zoid 3 barrel shock cannon piece and pipe were left unpainted
This is the classic case of expectation vs reality. Expectation was to have the rocket pods filled in red by flooding it with the Gundam Marker and cleaning it up after it has dried. The red should be left in the recessed area and all will be well with the world. The reality of it was slightly different. Once the marker was dried tried to remove the red with lighter fluid but was unsuccessful. Used the acrylic thinner next but was also unsuccessful. Next step was painting over the red with the Steel but the results made it messy and could not see the pods at all. Ended up stripping all the paints with lacquer thinner to bare plastic and start the process all over.
Next up is the main body. Wanted to make it pop but did not have any ideas popping into my mind except for orange for the pipe and the usual color treatment for the hydraulic pipe. Started work on the hydraulic pipe first with bronze (instead of gold) and silver markers. Gundam Marker Red used for the seat was next followed by the revived Mr.Base White 1000 which was used for another build to cover the red marks on the head.
The main body was starting to have some pop in color but still looks lacking. Remembered I bought a new paint which would be a good time to try.
Vallejo Metal Color 77.701 Aluminum
This is my first experience with Vallejo and got the one for airbrush as it has been pre-thinned. The color came out smooth and one layer is more than enough to cover the Steel base color. For painting small areas one can just use the excess paint from the cap after shaking. Plus the paint is water based and don't have to deal with the dangerous chemical vapors.
After all the planned raised parts was painted with Aluminum, noticed that there were more areas which can benefit from the same treatment. Was too engrossed with painting and forgot to snap any photos of the color in parts until they were all completed.
Completed main body. It looks a lot nicer compared to when it was all in Steel. Did not expect the Aluminum to look like the silver marker used for the hydraulic pipe.
If you remember earlier in the post that the pipe will be in orange, then kudos to you. It has been changed to red after painting one of the pipes orange as it looked out of place. Stripped the orange down and used the Gundam Marker Red instead. Will try to limit the colors for the rest of the kits to only those used in the main body.
After completion of the main body, decided to tackle the neck piece next. Maintained the same concept as the main body which was to use the Aluminum on the raised part but felt something was missing so painted the fins Aluminum as well.
This will be where I end this post. Next post will be painting all the weaponry and the legs for the Shield Liger.


No comments:
Post a Comment