Thursday, December 31, 2015

RG Exia - WIP 10 (Final)

 Make the last post of the year a good one
 
Usually I will end the review and WIP of the kit after going through the weapons. For this kit, I suddenly had an idea which is very obvious but did not occur to me. This post I will do some poses with the Exia. This will also give you a brief idea on how posable this kit is.
 
Usually I do not pose my kits much because 1) I do not know how to pose and 2) I'm scared of the paint chipping. Decided to tackle the first issue which is posing. What I did was follow the poses shown in the manual.
 
The first pose to cover will be the beam saber handle attached at the back skirt. Believe it or not, Exia is able to reach the back beam saber handle.

Front and back view of Exia reaching for the back beam saber
 

Friday, December 25, 2015

Updates (12)

Tis the season to be jolly !!
 

I would like to take this opportunity to wish all the readers a very merry Christmas. If you are reading this on Christmas Day, I would like to make a suggestion. Instead of  spending your time sitting in front of a computer, call friends or loved ones out and just spend some quality time with them.
 
If you are away from home, just give them a call just to say: "Hi and Merry Christmas !!". A wise person once told me Christmas will always be there but the company you are with will change. The company you mix with this year might not be there again the next. Things change, people change and definitely relationships change too so take this time to spend some quality time with them.
 

Wednesday, December 23, 2015

RG Exia - WIP 9

Getting ready for battle

Now that the Exia is completed, we will take a look at all the available weapons for this kit and attaching them on to the Exia. All I can say is that this kit has lots of it.

Weapons for the Exia

I did not notice that the Exia has a total of 4 beam saber handle attached. The picture above shows 6 but in reality only 2 has the peg for Exia to hold. A more in depth review of the weapons can be found in WIP 5.

Saturday, December 19, 2015
RG Exia - WIP 8

Too many of the same views 
 
Returning to work on the Exia after a short break with the Gustav. With the armouring of the Exia completed in the previous post, then only thing left to do is to assemble.
 
Exia still in pieces
 
My working process for any gunpla is the same: Work from the bottom up. Therefore the first thing to assemble are the legs.
 
Just attach the legs into the pegs are the hips. Make sure they are fully in. Do not be afraid to put a little pressure on the leg as they are sometimes tight.

Front and back

Wednesday, December 16, 2015

Blast from the past II

Nintendo games
 
A recent in Facebook by a friend, Tiger.Lim, made me think back to the good old days when I was young(er). It was a time way before Playstation, X Box and WII existed. It was even a time before GameBoy and Sega Game Gear. I'm talking about the early 1980's where one of the first handheld games was ever created. Here's a useful link on the chronological dates of when handheld games was created.

Tuesday, December 15, 2015

D-Style Gustav - WIP 2

Just keep trying, trying, trying

After some deep thought about the dilemma faced in WIP 1 and having a break from RG Exia again, I have decided to paint the shell and use both markers and paints to paint the details. I guess I will have to be extra careful when painting the details.

The first part I attacked was the pistons found on the shell.

Pistons to be painted gold and silver

Saturday, December 12, 2015

RG Exia - WIP 7

Obstacles here and there

Coming back to work on the RG Exia while I try to figure out the dilemma for the D-Style Gustav. With the head, weapons and legs done, the next section to assemble would be the chest and waist.

Pieces for the chest

I would like to point out some difficult parts I encountered during the assembling process. The first issue are the front and rear skirts area. The pieces are a bit tricky to assemble. Not only they are small but the way they go together really test out your patience. Just remember to keep calm and all will go well. It took me some tries before I finally got it in place.

The other issue I encountered was the loose 'antenna' on the chest. It does not stay in place and it always wants to be folded down. The hard part is you will need something sharp to hook it up. The last issue I encountered will be the GN drive. This is not really an issue but just something to be on the lookout for.

Thursday, December 10, 2015

Updates (11)

All about Star Wars
 
 
The hype for Star Wars Episode 7 is everywhere. You cannot go anywhere without someone talking about it or look at Facebook without a post on Star Wars. I know the fans are either buying or have already bought the tickets and are eagerly waiting for the 17th. I have bought my tickets and I too am eagerly waiting for the date to come.
 
I will dedicate this post to all Star Wars fans. I got some Star Wars stuff from the net and just want to share with the fans out there. Hope you enjoy it and May the Force be with You.
 

Wednesday, December 9, 2015

Updates (10)

New Zoids HMM 1/72 kit
 
Kotobukiya will be releasing a new HMM kit end of this year. It is the HMM Death Stinger. I know everyone is waiting in anticipation for this kit's release. I'm also looking forward to the release of this kit and I do hope the kit is still available when I have enough cash to get it.
 
"This gloriously detailed Highend Master Model kit of the EZ-306 Death Stinger from "Zoids" will be 9.50" (45cm) long when in sea scorpion mode! Among its features are the charged particle cannon in its tail, and the Strike Laser Bite Scissors can expose the Murphy AZ105mm linear cannon by opening and closing. The head armor opens and closes, exposing its eerie eyes! The cockpit opens and closes; a pilot figure is included. The E-Shield Generator on the head armor can expand, and the mouth is equipped with the Laser Fang. The AZ930mm2 twin shock gun is posable, as is the rocket booster, and four pairs of its legs are fully posable too!"
 

Tuesday, December 8, 2015

D-Style Gustav - WIP 1

Dilemma, dilemma, dilemma
 
I will be working with the D-Style Zoids along side the RG Exia. Since the Exia is almost at the completion stage, there should not be any problems if I were to start working on this. I'm going to do something a bit different. Starting from now, I will put a scanned image of the box art.
 
There are a few reasons which made me thought of doing this: 1) Able to appreciate the box art, 2) Able to help If anyone wondering how the box looks like, 3) If I'm going to do some painting, I can use the box art as a reference.

Front of the box

Updates (9)

Interesting things from the net
 
I was looking through Facebook and whenever I come across something interesting, I will save it into my phone to view it again later. These are a few images I got from Facebook.
 

Saturday, December 5, 2015

RG Exia - WIP 6

 A change of heart
 
This will be the first time I will be assembling the inner frame for the RG line.
 
Inner frames ready and waiting
 
The inner frame when put together makes Exia looks anorexic.

Wednesday, December 2, 2015

RG Exia - WIP 5

Plated parts finally revealed
 
With the work for the MS completed in the previous post, this post will be about the weapons and the highly anticipated plated weapons.

Since there is no inner frame to work with, the first work to be done with this kit is to panel line the pieces and start the decaling process after cleaning the excess panel line.
 
Left: Pieces after panel lining
Right: Excess panel line cleaned and  pieces decaled

Since the work for all the parts are now officially completed, I will show the pilot or the 1/144 scale Setsuna F. Seiei.

1/144 scale Setsuna

Tuesday, December 1, 2015

Updates (8)

An unexpected purchase
 
This really is an unexpected purchase. I saw this kit in the online store and also saw it on the shelf in the shop a few times but it did not catch my eye until recently. I'm not sure how or when this kit crept into my mind and stayed there nudging me to get it.
 
As usual, before I decide to get any kits, I will try to do as much research as possible about the particular kit of interest. I found a lot of interesting things about this kit. 1) It has a slight pearl coating on the white armors, 2) The teeth and claws are gold plated, 3) Cool looking attack booster/back pack  and last of all 4) Lots of decals.
 
There are also drawbacks to this kit. 1) Loose joints, 2) lack of poseability, 3) expensive, 4) breaks apart when trying to pose. After considering the pros and cons about this kit, as they say, the rest is history. What kit did I get? This is the kit...

Saturday, November 28, 2015

RG Exia - WIP 4

Confusion leads to mistake

On to the next and final part for the RG Exia (excluding the weapons) after completing the body.

Parts of the hand
 
With all the nub marks removed, inner frame of the hand is actually very simple. All you have to do is to remove the wrist which is the same process as the RG RX 78-2. After removing the wrist, just bend the inner frame up to lock some pieces together and viola! A completed inner frame.
 
The only difference between this inner frame and the one with the RG RX 78-2 is that the Exia inner frame requires a foil sticker followed by the clear blue transparent piece.

Tuesday, November 24, 2015

RG Exia - WIP 3

The Fantastic Four
 
Mentioned in the previous post, the waist and the chest are next. Original plan was to do both the waist and chest in different post but when I looked through the manual, I found it pointless to do them separately.
 
Tools on stand-by for the nub removal process for the waist and chest parts
 
With all the nubs removed, the next stage is to assemble the inner frame.
 
Top 3: Chest inner frame
Bottom 3: Waist inner frame
 

Saturday, November 21, 2015

Updates (7)

New stock, new loot and some truth
 
Recently the stock came for two kits which was in my wishlist. There was limited stock for both kits but I was a bit strapped for cash so I just enquired about the price and availability for both kits. The owner mentioned that one of the kits only has 2 sets and one set was picked up earlier in the day. I then asked which branch has the other kit left and went about my day waiting for his reply.
 
Later I got a reply and he mentioned there is still one kit left at the branch in town and he told his staff to reserve it for me together with the other kit in my wish list. Curious to know what was in my wishlist which I managed to get my hands on?

Wednesday, October 28, 2015

RG Exia - WIP 2

Not the usual process and procedure
 
Work for the head will start after the completion for the work on the leg. I know the head is usually left last to signify the end of the build but I was afraid that the same incident like what happened to the RX 78-2 will happen to this kit. So to put my mind at ease, I decided to build the head first.
 
The first piece I picked up to clean the nubs was the V-fin. I was surprised at how large the nub mark was.
 
My, what big nub you have?
 
This does not make sense because the V-fin is so small. Why did the designer have to design such a big nub mark for such a small piece? The thoughts that went through my mind was the designer was either drunk, too tired or had just developed some eye sight problem.

Tuesday, October 27, 2015

RG Exia - WIP 1

An old highly anticipated gunpla
 
Decided to start on another RG kit since the completion last RG kit was in March and I feel of having an OOB built to distress from working on the PG Red Frames. Was looking through the backlogs to see which kits I would keep and which to sell. That was when I saw this RG and decided to build it since it was famous for being the First RG to have plated weapons. Do you know which RG I'm referring to? It is none other than the RG Exia.
 
Manual and tools prepared for the build

Monday, October 26, 2015

Updates (6)

New stock, new stock
 
Went over to Borders today to enquire and order some books. The first thing I did was to look for the metal puzzle section. I went to the previous location and could not find any of it. I thought they might have either sold out all the models or they have returned the unsold kits to the supplier. After walking and looking at some board games, I saw the metal kits display.
 
I looked through the Star Wars model kit and saw the usual kit which is still available from my last visit: Destroyer droid, X-Wing and Tie Fighter. Then I saw 2 other kits which was new. The R2-D2 and Millennium Falcon.

Friday, October 23, 2015

Updates (5)

 Stickers be gone!!
 
You know that with any items bought from shops, there will be those pesky price tags or labels on them? Have you tried removing them by just slowly peeling them off and hoping that they do not tear and leave some sticky residue behind? I know I have tried doing that for years. Sometimes when I'm lucky, they come off nice and clean. Most of the time they will leave some glue behind and I will use something to rub on it until it comes completely off.
 
Recently I was curious to know if there are any methods to safely remove them without damaging the box or package. I asked around and did a quick research and managed to find 2 methods which works and they are all inexpensive and readily available in the house.

Thursday, October 22, 2015

Metal Earth: AT-AT - WIP 3 (Final)

Good to have spares

With the completion of the partial lower parts of the AT-AT in WIP 2, we will now work on completing the lower sections and attaching the main body to the kit.
 
The first thing to do is another set of reps. This time is the base of the foot. The instructions states that 4 nos are required.

Pieces for the base of the feet 
 
You will have to bend 2 circular  pieces together 4 times. I'm not good at making things circular so all the foot base have different shapes to it. I guess no one will be able to notice it unless they look at it real close.
 
Top view of the completed foot base

Tuesday, October 20, 2015

Metal Earth: AT-AT - WIP 2

Reps is the way to go

The next part according to the instruction sheet are the legs:

The instructions do look simple but in truth, they are a bit more complicated and requires you to think before you bend. After removing all the required the parts from the runner and assembling them, this is how the completed leg will look like.

Right and left view of the completed leg

There is an interesting text at the bottom or the base plate:

Text at the bottom of the base plate

Sunday, October 18, 2015

Metal Earth: AT-AT - WIP 1

Something new

In the post "The unexpected purchase" I showed that I got a few (5 to be exact) Star Wars metal earth 3D puzzles from Borders. Once I finished the small kits, I started opening the AT-AT to get a feel on how building a metal kit will be and how different the experience will be from building a plamo.

This is the front and back view of the AT-AT package:

Front and back view

When opening the box, I tried to cut as small as possible to preserve the back photo of the AT-AT but that did not work out as expected. I had to cut where the picture of the scissors is thus cutting off the AT-AT words at the top.
 
Packaging after the cut

Upon opening the package, there will be 3 things inside: 1) Metal runers x 2 and 2) instruction sheet.

Contents in the package

Friday, October 16, 2015

Small scale gunpla - WIP 5 (Final)

An interesting feature
 
Detailing work can start for the Gyan since the Zaku has been assembled. The first thing to tackle is the color for the body. I used violet as the base color for this kit. The only work left is to paint the body a dark blue.
 
Left: On-going painting work
Right: Completed paint job and panel lining
 
Once the paint is dry and matt coated, the kit is assembled. In WIP 1 I mentioned both the instruction sheet for the Gyan and Zaku are the same. I'm guessing that since this build is so straight forward that the manufacturer could save money on creating a new instruction sheet for the Gyan and just print the Zaku instruction instead.
 
After a few minutes of snapping everything together, here is the completed Gyan:
 
Gyan assembled

Sunday, October 11, 2015

Small scale gunpla - WIP 4

Too much arm rotation

Now that all the painting work has finished, the assembly process can start after all the parts have been panel lined. The main thing to watch out for are the right shoulder joint and the energy pipe at the leg which was glued back in Part 2. It would a shame for those parts to break again.

All parts waiting to be assembled
 
There is nothing complicated in assembling this kit. It is very straight forward build. After a few minutes (there were some issues assembling the body), you have the completed Zaku II:
 
Front and back view of the kit

Saturday, October 10, 2015

Small scale gunpla - WIP 3

Another mystery solved!!

While waiting for the super glue to dry on the Zaku, work has started on the Gyan.
 
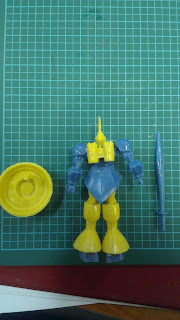
Parts of Gyan waiting to de-nub
 
The moulding for Gyan is worse than the Zaku. There are lots of excessive plastics which needs to be trimmed off. On top of that I found a flaw in the moulding process which I don't think will affect the kit in any way.
 

Flaw in the moulding
 
I'm also curious to see if the scale of this model kit is the same as the Zaku. The only way to do that is to do a quick snap fitting...

Front and back of Gyan

Saturday, October 3, 2015

Small scale gunpla - WIP 2

Mystery solved !!
 
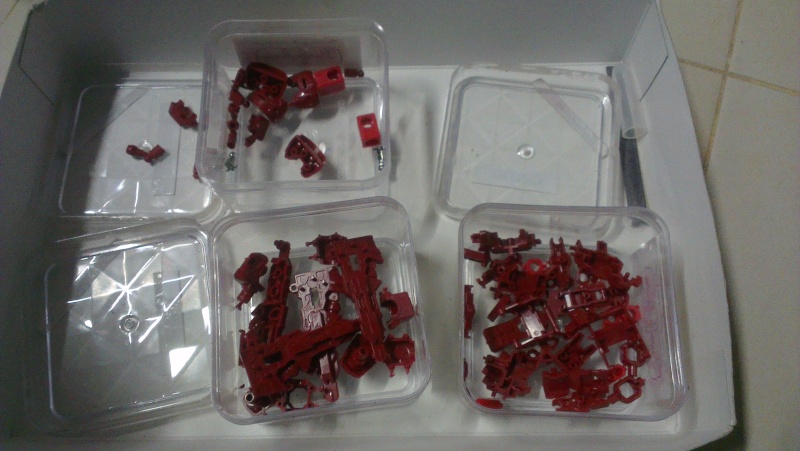
Started working on these kits after the unboxing and completed the pending part of the PG Astray Red Frame. Removed the parts from the runners into their respective container. This time instead of keeping different parts of the models in different containers, I kept all in the same container. The parts are easy enough to differentiate without any having any confusion.
 
Being curious about the scale of this kit, I did a quick snap fitting (after removing nub marks) to see how big the final kit will be and also how the odd colors come together. First thing I did was to attach the right hand onto the body, adjusted it a little and to my horror this is what happened:

Saturday, September 26, 2015

PG Astray Red Frame - WIP 5

Missing caps here and there
 
I know I mentioned in one of the previous post that all work on the Red Frames will come to a halt. I figure I might as well complete what I was working on before my work schedule went bonkers. This way in future I won't have to try and figure out what I was working on and what was my idea for this kit when I decided to stop. I know that I should be working on the smaller kits instead but I promise that after this, I will either concentrate on them or start another small kit. Why another small kit? Well, if you compare any other kits (other than Mega Size) to this, all other kits are small. ^_^.
 
Back to the main purpose of this post. Since the inner frame of the upper legs was completed, the next work to be done will be the inner frame of the lower leg.

Parts of the lower legs separated into their respective color boxes

Sunday, September 20, 2015

Updates (4)

An unexpected purchase
 
Heard of Metal kit before? I first heard about it a few moons ago when GN Particles posted his WIP of the RX 78-2. From what I know, there were limited RX 78-2 and Zaku II metal kits produced at the time. From that day onwards, I've been seeing a lot of small kiosk in shopping malls selling the metal kits but they are mainly of iconic landmarks. My search for the Gundam and Zaku II metal kits are still on-going.
 
Went to Borders a couple of months ago and to my surprise, they have some Star Wars kit on sale but what was in stock was the AT-AT and destroyer droid. Those did not catch my interest so I didn't get it. 2 things can happen from here on: 1) Hope they will restock it with other kits and 2) this is their only stock and when it is sold out, it is sold out.
 
To my surprise when I went to Boarders today, they have replenished the kits with a new stock. I took a quick scan through the piles and saw some new and interesting kits which caught my attention. They were also limited kits so if I pass this opportunity again, I would be kicking myself. Therefore I applied the saying mentioned in the previous post: "When in doubt, buy".
 

Friday, September 18, 2015

Updates (3)

When in doubt, buy
 
I saw that verse a few years ago when I was in the UK at a shopping district. It was printed in a big eye catching font and placed at a very strategic location. I have been using this for a few years now. As with everything and anything in life, it has its own good and bad points.
 
Let's start with the bad. With this verse constantly replaying in your head, you will be tempted to buy anything you set your eyes at. This is good if you have a bottomless pit of cash in your bank account. This can seriously make you go bankrupt or be in a lot of debt. Like everything in life, moderation is the best way to go.
 
The good thing is whenever you are in doubt means you really want the item but cannot decide if it was worth it to get. Mostly at this stage you will be weighing the pros and cons and getting more confused and frustrated. This is where the verse comes in. It is better to buy when you are in doubt and thinking about it day and night than not getting it and regret it when you don't see the item anymore on the shelf. This is even more frustrating if it is a limited item and online store prices are ridiculously expensive.

Updates (2)

A change in perspective is good

Found out about this article earlier in the day and I just finished reading it. It is about scale modelling and the best part of it is that it is written from the wife's perspective. It is an interesting article and what the writer writes about is so true.
 
The biggest challenge is to get my wife to read it and so she can understand and know Why Scale Modeling is a Great Hobby.

Thursday, September 3, 2015

Some smaller kits - WIP 1

What is your scale?
 
Mentioned in the last post, I will be doing some smaller kits. When I mentioned that, I don't think these guys popped into your mind. I'm betting you are thinking in the size of 1/200 or maybe even SD gundam. I assure you that that is not the case.
 
I happen to come across them by chance in a sundry shop in my neighbourhood. I went there with my missus to look for some cheap hangers and toys for her nephews. While browsing the shop, I saw a few lego minifigures (bootleg), bubble blowing chemical and a few of these hanging on a cardboard. Did a quick scan through and there was only 2 different types available. Since it cost only MYR 3.90, I got them both.

Sunday, August 16, 2015

Updates (1)

Two for the price of one

Firstly I want to apologise for not updating the blog regularly this month. Was having a very hectic month at work and had a change in my work schedule which threw my plamo time haywire. I'm hoping things will settle back down so I have time to work on the kits again.

Another matter to update is that the WIP for the Red Frames will come to a halt for the time being. As mentioned in WIP 4, I was given a dateline to complete both kits and to tidy the room. Since my work schedule changed, I know I won't enough time and can't complete both kits by the stated dateline. Besides the dateline, I'm feeling a bit burned out tackling both PGs at the same time. For now, I think the best way to go about this is to stop the WIP for these massive kits and to concentrate on other smaller kits to reduce the number of backlogs before the arrival of the massive Mechanicore Deep Striker.

Saturday, July 18, 2015

PG Red Frame - WIP 7

Remember what happened the last time...
 
Back to working on the Red Frame after reviewing Roar. Since the katanas were completed, the legs for the Red Frame will be the star of this post. I will use the same concept when I was building the legs of the Blue Frame i.e. splitting the legs into two sections: upper and lower legs.

Work will begin with the upper legs first. Parts of the legs were split into their respective boxes according to the color they will be sprayed in. I started on the gold parts because they were the least amount of pieces to work on.

Gold pieces for the upper leg

Some minor detailing, panel lining and a layer of Future was applied to pieces when the paint was dry.
 
Gold pieces of the upper legs waiting for the Future to dry

Saturday, July 11, 2015

Modern vs traditional

Choose your side...
 
Books vs technology
 
Saw this picture on the internet not too long ago. There is some truth to it. I personally prefer books over modern technology. Nothing beats the feeling of the book in your hands, the smell of the book when you first unwrapped and flip through the pages and when you are so into the story, your finger will automatically flip the page for you even though you plan to call it a night.

Saturday, June 27, 2015

ToyWorld TW-D01: Roar - Part 2 (Final)

Major back problem

Mentioned in Part 1, there is a gap found at Roar's tail. Managed to figure out the reason for the gap? Like for Muddy, everything has its place and the gap is meant for the sword.
 
Gap found at Roar's tail
 
To attach the sword, first you will have to split open the tail.
 
Split open tail with sword indentation
Related Posts Plugin for WordPress, Blogger...